Are you a maker of beautiful handmade items? Do you want to attract more customers and showcase the unique details and craftsmanship of your creations? Look no further than product photography!
With high-quality images, you can captivate your audience and make your handmade items shine. In this article, we will explore the importance of product photography for showcasing handmade items and provide you with tips and techniques to create stunning images that will grab attention and boost your sales.
In today’s digital age, where online shopping has become the norm, the visual appeal of your handmade items can make all the difference. High-quality product photography allows potential customers to see the intricate details, textures, and colors of your creations, giving them a sense of the quality and craftsmanship that sets your products apart.
With well-captured images, you can create a strong first impression, enticing customers to explore further and ultimately make a purchase. Whether you sell on an e-commerce platform or through social media, investing in product photography is a crucial step towards success in the handmade industry.
So, let’s dive into the world of showcasing handmade items with product photography and discover how you can make your creations stand out from the crowd.
Key Takeaways
- Composition and styling are crucial in product photography, especially when showcasing handmade items.
- Natural light should be utilized whenever possible, and items should be arranged in an appealing way to create visually appealing images.
- Editing and post-processing techniques can greatly enhance the overall aesthetic of handmade products, such as adjusting exposure, enhancing colors, removing distractions, and refining details.
- By incorporating these techniques, you can attract customers and effectively showcase the beauty of your handmade creations.
Importance of High-Quality Product Photography
You may think that any photo will do, but when it comes to showcasing your handmade items, high-quality product photography is the cherry on top that really makes your creations shine like a diamond in the rough.
In today’s digital age, where potential customers are bombarded with countless online options, having visually appealing product photos can make all the difference in capturing their attention and encouraging them to make a purchase.
When you invest in high-quality product photography, you’re essentially investing in your brand’s image and reputation. Customers are more likely to perceive your handmade items as being of higher quality and value when they’re presented in an aesthetically pleasing and professional manner.
By showcasing your products in the best possible light, you’re sending a message to your customers that you care about the details and take pride in your work.
Furthermore, high-quality product photography can help you stand out from your competitors. With so many online marketplaces and social media platforms available, it’s crucial to find ways to differentiate yourself.
By having visually stunning product photos, you can grab the attention of potential customers and make them stop scrolling. This can lead to increased engagement, more website traffic, and ultimately, more sales.
In conclusion, don’t underestimate the power of high-quality product photography when showcasing your handmade items. It can elevate your brand, attract customers, and set you apart from the competition.
So, invest in professional photography or dedicate time and effort to improving your photography skills. Your creations deserve to shine like the masterpieces they are.
Equipment and Setup for Product Photography
To capture the best images of your creations, it’s essential to have the right equipment and a well-organized setup. Investing in high-quality photography equipment will greatly enhance the overall look and feel of your handmade items. Here is a table outlining some essential equipment and tools you should consider for your product photography setup:
| Equipment/Tool | Description |
|---|---|
| Camera | A digital camera with manual settings will give you the most control over your images. Look for one with a high megapixel count for crisp, detailed shots. |
| Tripod | A sturdy tripod will help eliminate any camera shake and ensure your images are sharp and in focus. |
| Lighting | Good lighting is crucial for capturing the true colors and details of your handmade items. Consider using natural light or investing in a set of studio lights for consistent and well-lit shots. |
| Background | Choose a clean and neutral background that won’t distract from your handmade items. A plain white or light-colored backdrop works well for most products. |
| Props and Styling Tools | Props and styling tools can help enhance the overall aesthetic of your product photos. Consider using items that complement your handmade items and add visual interest. |
In addition to having the right equipment, it’s important to set up your photography area in a way that maximizes your creativity and efficiency. Here are some tips for setting up a well-organized product photography space:
- Find a dedicated space: Designate an area in your home or studio specifically for product photography. This will allow you to leave your setup in place, making it easier to capture photos whenever inspiration strikes.
- Set up a shooting table: Invest in a shooting table or create your own using a flat surface and a seamless backdrop. This will provide a consistent surface for photographing your handmade items and help create a professional look.
- Organize your props and tools: Keep your props, styling tools, and equipment within easy reach. This will save you time and prevent distractions during your photo sessions.
- Experiment with different angles and compositions: Don’t be afraid to get creative with your product photography. Try shooting from different angles, experimenting with composition, and playing with depth of field to create visually interesting and engaging images.
By having the right equipment and an organized setup, you’ll be able to capture stunning images of your handmade items that truly showcase their beauty and craftsmanship.
Lighting Techniques for Capturing Handmade Items
Illuminate your handmade creations using various lighting techniques to capture their intricate details and bring them to life in stunning photographs. Lighting plays a crucial role in product photography, as it can enhance the textures, colors, and overall appeal of your handmade items.
Here are three lighting techniques that you can use to showcase your creations:
- Natural light: Utilizing natural light can produce beautiful and soft lighting for your photographs. Find a well-lit area near a large window or set up your shooting area outdoors. Position your handmade item near the window or in a shaded area to avoid harsh shadows. Experiment with different angles and distances from the light source to achieve the desired effect.
- Softbox lighting: Softboxes are a popular choice for product photography, as they provide diffused and even lighting. These light modifiers can help eliminate harsh shadows and create a soft, flattering glow on your handmade items. Place the softboxes on each side of your subject, slightly angled towards it. This will help create a balanced and three-dimensional look.
- Light tent: A light tent, also known as a lightbox, is a portable and affordable option for capturing handmade items. It is a box-like structure made of translucent material that diffuses light evenly, minimizing shadows and reflections. Place your item inside the light tent and position your light source outside the tent. This will create a soft and diffused lighting effect, highlighting the details of your creations.
By using these lighting techniques, you can elevate your product photography and truly showcase the beauty and craftsmanship of your handmade items. Experiment with different setups and lighting angles to find the perfect combination that brings out the best in your creations.
Composition and Styling Tips for Showcasing Handmade Items
When it comes to displaying your handmade creations, paying attention to composition and styling can make a big difference. The way you arrange your items and the overall aesthetic you create can greatly enhance the appeal and visual impact of your product photography.
One important aspect to consider is the use of props and backgrounds. Choosing props that complement your handmade items can help create a cohesive and visually appealing composition. For example, if you’re showcasing handmade jewelry, you could use a small jewelry box or a velvet cloth as a prop.
Additionally, selecting the right background can also enhance the overall look of your photos. Consider using neutral or complementary colors that don’t distract from the main focus – your handmade items.
In addition to props and backgrounds, the composition of your product photography plays a crucial role in showcasing your handmade items. One principle to keep in mind is the rule of thirds. This rule suggests that you should imagine dividing your photo into nine equal parts by drawing two vertical lines and two horizontal lines. By placing the main subject of your photo along these lines or at their intersections, you can create a more visually balanced and interesting composition.
Another tip is to experiment with different angles and perspectives. Try taking photos from different heights and distances to find the most flattering and unique angles for your handmade items.
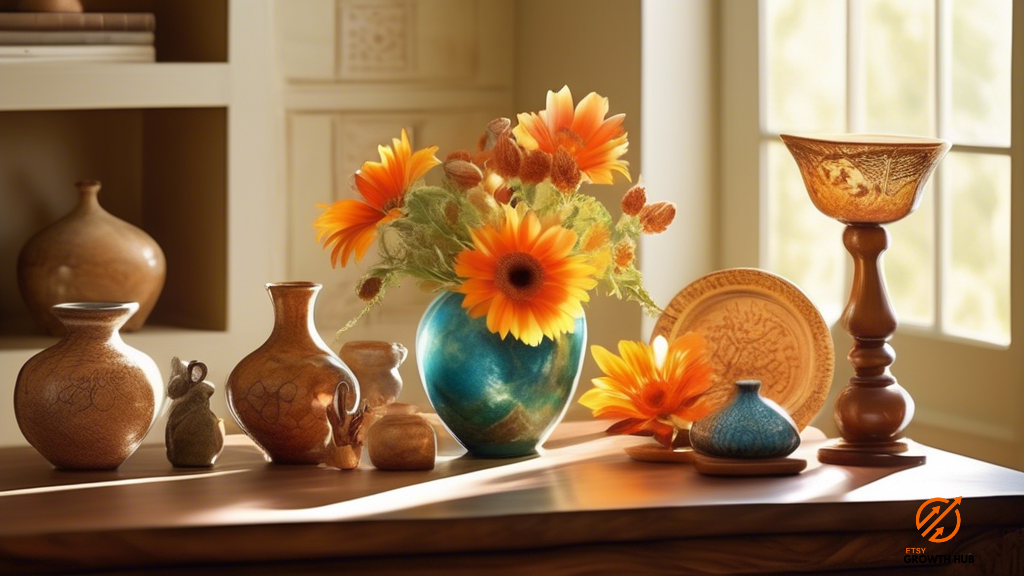
Lastly, don’t forget to pay attention to the overall styling of your photos. This includes considering the use of natural light, arranging items in an appealing way, and ensuring that your handmade creations are the main focus of the composition.
By following these composition and styling tips, you can create captivating product photography that showcases your handmade items in the best possible way.
Editing and Post-Processing for Product Photography
Enhancing the visual appeal of your creations through editing and post-processing can elevate the overall aesthetic of your handmade products. By using editing techniques, you can create stunning product photos that captivate your audience and showcase your items in the best possible light.
Here are a few tips to help you enhance your product photography through editing:
- Adjust the exposure: Proper lighting is crucial for product photography, but sometimes it’s challenging to achieve the perfect lighting conditions. Editing allows you to adjust the exposure to make your products look well-lit and vibrant.
- Enhance colors: Colors play a significant role in attracting attention and conveying emotions. With editing software, you can enhance the colors of your products, making them appear more vibrant and eye-catching.
- Remove distractions: Sometimes, despite your best efforts, there may be distractions or imperfections in your product photos. Editing allows you to remove unwanted elements, clean up any blemishes, and create a clean and polished final image.
- Sharpen and refine details: Editing software enables you to sharpen the details of your products, making them appear crisp and professional. You can also refine small imperfections, ensuring your handmade items look flawless in your photos.
By incorporating these editing techniques into your product photography workflow, you can take your handmade items to the next level and create visually appealing images that attract customers and highlight the beauty of your creations.
Frequently Asked Questions
How can I capture the intricate details of my handmade items in product photography?
You’ll need to become a photography magician to capture every minuscule detail! With a camera in hand, zoom in like never before, revealing the tiniest stitches and textures, creating mesmerizing visuals that make jaws drop.
What are some tips for creating a cohesive and visually appealing product display for showcasing my handmade items?
To create a cohesive and visually appealing product display, use consistent backgrounds and lighting. Arrange your items in an organized and balanced manner, and consider using props or backdrops that complement your handmade items.
Are there any specific camera settings or techniques that can help enhance the colors and textures of my handmade items in product photography?
To enhance the colors and textures of your handmade items, try adjusting the white balance to capture accurate hues. Additionally, experiment with aperture settings to create a shallow depth of field and make your items pop.
How can I effectively capture the size and dimensions of my handmade items in product photography?
To effectively capture the size and dimensions of your handmade items in product photography, make sure to include a reference object or scale next to the item. This will provide viewers with a clear understanding of its size.
Are there any editing techniques or software recommendations that can help enhance the overall look of my handmade items in product photography?
To enhance the overall look of your handmade items in product photography, consider using editing techniques like adjusting brightness, contrast, and sharpness. Software recommendations include Adobe Photoshop, Lightroom, and Canva for easy and professional edits.
Last Updated: January 22, 2024
Disclosure: We may receive affiliate compensation for some of the links in this article at no additional cost to you if you decide to purchase a product. You can read our affiliate disclosure in our privacy policy.
Kevin Fairbanks is your expert navigator in the world of Etsy business. With a passion for creativity and a deep understanding of the e-commerce landscape, Kevin brings a wealth of knowledge to aspiring and established Etsy sellers alike.
As a seasoned entrepreneur and successful owner of multiple Etsy shops, Kevin knows firsthand the challenges and triumphs of the Etsy marketplace. His journey is one of innovation, perseverance, and a keen eye for market trends, making him an invaluable guide for anyone looking to succeed on Etsy.
Kevin’s expertise extends beyond just shop management; he is adept in areas such as SEO optimization, effective marketing strategies, and financial planning for online businesses. His insights are grounded in real-world experience, offering practical and actionable advice.
Join Kevin as he shares his journey and expertise on Etsy Growth Hub. Whether you’re starting your first Etsy shop or looking to expand your existing business, Kevin’s guidance is designed to help you navigate the complexities of Etsy selling with confidence and creativity.
Stay tuned with Kevin’s latest strategies and tips on Etsy Growth Hub to transform your passion into a thriving online business. His dedication to empowering Etsy sellers is evident in every piece of advice he shares, helping you turn your Etsy dreams into reality.
Verified and Approved by:

Kevin Fairbanks
Head of SEO
Like This Article?
Share with your friends
Table of Contents
Latest Articles
Keep Reading
-
The Ins and Outs of Pricing Strategies for Etsy Sellers
Discover our tips on finding the perfect pricing strategy for your Etsy shop: pricing for profit, understanding your costs, and finding the sweet spot.
-
Riding The Wave: Staying On Top Of Etsy Shop Trends
Stay ahead of the competition on Etsy by mastering the latest shop trends. Learn how to ride the wave of success and maximize your profits. Don’t miss out, click now for insider tips and tricks!
-
Craft Pricing Strategies For Your Handmade Products
Unlock the Art of Crafting Profits: Master the Secrets of Pricing Your Crafts for Maximum Sales! Boost your handmade business with effective strategies and attract customers today!


