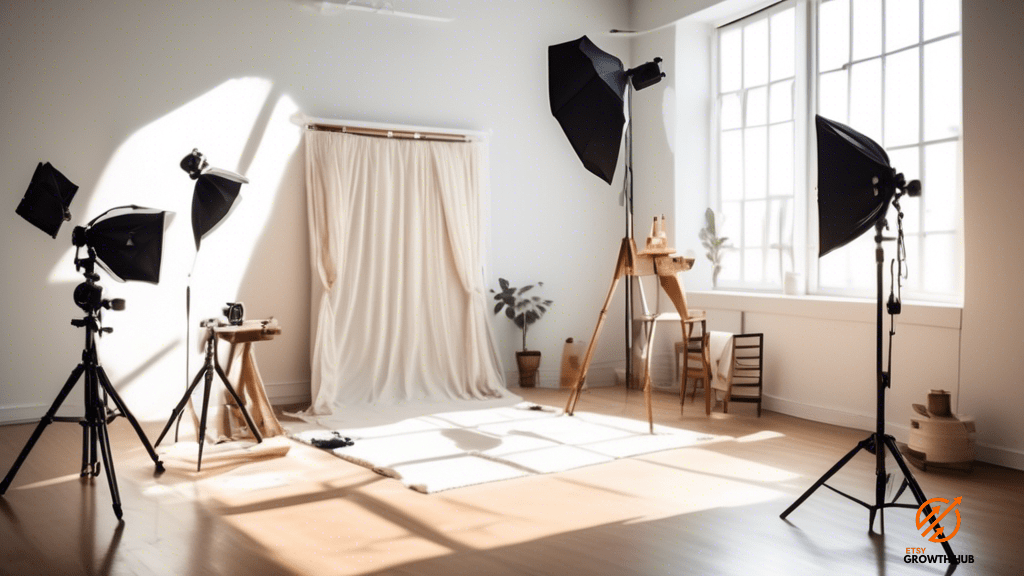
Setting Up Your Product Photography Studio
by Kevin Fairbanks · February 20, 2024
Capture the attention of customers and boost sales with our expert tips on setting up your product photography studio. Learn how to create stunning photos that will captivate viewers and increase click-through rates. Click now to elevate your product photography game!
Are you ready to dive into the world of product photography? Setting up your very own studio can be as exciting as stepping into a painter’s workshop, where every brushstroke is a masterpiece waiting to be captured.
Just like a potter with a lump of clay, you have the power to shape and mold your images, creating visual stories that will captivate your audience. But before you can begin this creative journey, you need to lay the foundation for your studio. In this article, we will guide you through the process of setting up your product photography studio, from choosing the right equipment to perfecting the final touches.
The first step in building your photography empire is selecting the right equipment. Just as a chef carefully selects their knives and pots, you must choose your camera, lenses, and other accessories with precision. We will explore the options available to you and help you determine what will best suit your needs.
Next, we will delve into the world of lighting, an essential element in creating stunning product images. We will discuss different lighting setups, techniques, and tools that will bring out the best in your products.
So, grab your camera and let’s embark on this exciting journey of setting up your product photography studio!
Choosing the Right Equipment
Now that you have a clear understanding of the importance of choosing the right equipment, it’s time to dive into the specifics of what you’ll need for your product photography studio.
The first and most essential piece of equipment you’ll need is a high-quality camera. Look for a DSLR or mirrorless camera that allows you to manually control settings such as aperture, shutter speed, and ISO. This will give you the flexibility to capture your products in the best possible way.
Next, you’ll need a selection of lenses. A versatile lens for product photography is a macro lens, which allows you to capture fine details and close-up shots. Additionally, a standard lens can be useful for capturing wider shots and showcasing the entire product. Consider investing in a prime lens with a wide aperture for creating a shallow depth of field and achieving that professional, blurred background effect.
In addition to your camera and lenses, you’ll need lighting equipment to ensure your products are well-lit and properly showcased. Start with a basic lighting setup that includes at least two softbox or umbrella lights. These lights help to diffuse the light and create a soft, even illumination on your products. You may also want to invest in a light tent or lightbox, which provides a controlled environment for photographing small products and helps to eliminate harsh shadows.
By choosing the right equipment, you’ll set yourself up for success in your product photography studio. Remember to do your research, read reviews, and consider your specific needs before making any purchases.
With the right tools in hand, you’ll be well-equipped to create stunning images that will captivate your audience and showcase your products in the best possible light.
Setting Up Lighting for Perfect Shots
To achieve perfect shots, all you need is the right lighting setup in your product photography studio. Lighting is one of the most important factors in creating high-quality product photographs. It can enhance the details, colors, and textures of your products, making them look more appealing to potential customers.
When setting up the lighting for your studio, start by choosing the right type of lights. Continuous lights, such as LED panels or fluorescent lights, are a popular choice for product photography because they provide a consistent and even light source. You can also use strobe lights if you prefer a more powerful and versatile lighting option.
Next, consider the placement of your lights. Position them at different angles to create depth and dimension in your photos. For example, using a key light at a 45-degree angle to the subject can create a nice balance of light and shadow. You can also add fill lights on the opposite side to reduce harsh shadows and create a more even lighting effect.
Experiment with different lighting setups to find the one that works best for your products. Remember to test the lighting before starting your photo shoot to ensure that it’s producing the desired results. With the right lighting setup, you can capture stunning product photographs that’ll attract customers and showcase your products in the best possible light.
Creating a Functional Shooting Space
First, make sure you have a shooting space that’s functional and conducive to capturing stunning product photographs that’ll captivate your audience.
Start by choosing a location with enough space to set up your equipment and move around comfortably. It’s important to have adequate space to position your products and set up your lighting and props without feeling cramped.
Additionally, consider the layout of the space. Look for an area with good natural light, as this can enhance the overall quality of your photos. If natural light isn’t sufficient, invest in artificial lighting options such as softboxes or strobes to create a well-lit environment.
Next, organize your shooting space in a way that allows for easy access to your equipment and props. Set up a designated area for your camera, tripod, and lighting equipment so that they’re easily within reach. This’ll save you time and make the process more efficient.
Additionally, create storage solutions for your props and accessories so that they’re neatly organized and easily accessible. This’ll help you stay organized and prevent any unnecessary distractions during your photo shoots.
Finally, consider the background and backdrop options for your product photography. Choose a neutral or complementary backdrop that’ll enhance your product and make it the focal point of the image. Experiment with different textures and colors to create unique and visually appealing compositions.
By creating a functional shooting space, you’ll be able to capture stunning product photographs that’ll captivate your audience and showcase your products in the best possible way.
Styling and Props for Product Enhancement
When it comes to enhancing your product photography, don’t forget about the power of styling and props to create an eye-catching image. Adding the right props and styling elements can make a world of difference in how your products are perceived and can help create a cohesive and visually appealing image.
Here are some tips to consider when it comes to styling and props:
- Background: Choose a background that complements your product and enhances its features. Opt for a clean and simple background that doesn’t distract from the main subject. Consider using props that can add depth and interest to the image, such as a textured fabric or a simple piece of furniture.
- Props: Select props that are relevant to your product and help tell a story. Use props that can enhance the product’s functionality or showcase its features. For example, if you’re photographing a skincare product, you could include a fresh flower or a soft towel to convey a sense of luxury and indulgence. Be mindful of not overcrowding the image with too many props, as it can take away from the main focus.
- Lighting: Proper lighting is crucial in product photography. Consider using natural light or a studio lighting setup to highlight your product and create a visually pleasing image. Experiment with different lighting angles and intensities to find the best lighting setup for your product.
- Composition: Pay attention to the composition of your image. Use the rule of thirds to create a balanced and visually appealing composition. Place your product off-center and use props to fill the empty space. Consider using leading lines or frames within the image to guide the viewer’s eye towards the main subject.
By paying attention to styling and props, you can elevate your product photography and create images that capture attention and engage your audience. Experiment with different elements and techniques to find a style that best represents your brand and products.
Editing and Retouching for a Professional Finish
Achieve a polished and professional look for your product photos with expert editing and retouching techniques. Editing and retouching can make a significant difference in the final appearance of your product images, enhancing their quality and appeal.
Start by using photo editing software, such as Adobe Photoshop or Lightroom, to adjust the exposure, color balance, and sharpness of your photos. This will help to ensure that your products are accurately represented and that the colors are true to life. Additionally, you can use editing tools to remove any imperfections or distractions from the background, ensuring that the focus remains solely on your product.
Retouching is another crucial step in achieving a professional finish for your product photos. This process involves refining the details of your images by removing blemishes, wrinkles, or any other flaws on your products. It’s important to strike a balance between retouching to enhance the appearance of your products and maintaining their authenticity. Avoid excessive retouching that may mislead customers or create unrealistic expectations. Remember, the goal is to showcase your products in the best possible way while still accurately representing their true appearance.
By utilizing expert editing and retouching techniques, you can elevate the quality of your product photos and create a visually appealing and professional image that will attract customers and drive sales.
Frequently Asked Questions
How can I effectively utilize natural lighting in my product photography studio?
To effectively utilize natural lighting in your product photography studio, make sure to position your shooting area near a large window. This will provide ample light and create a warm, nostalgic atmosphere that will captivate your audience.
What are some common mistakes to avoid when setting up a shooting space?
When setting up your shooting space, avoid common mistakes like cluttering the area with unnecessary props, failing to consider the background, neglecting to test the lighting setup, and overlooking the importance of organization and cleanliness.
Are there any specific tips for styling and props that can enhance the overall look of my products?
When it comes to styling and props, think outside the box! Incorporate items that relate to your product’s theme or use props that highlight its features. Remember, a well-chosen prop can take your product photography to the next level!
What are some recommended software or tools for editing and retouching product photos?
For editing and retouching product photos, some recommended software and tools are Adobe Photoshop, Lightroom, and Capture One. These programs offer a wide range of features and capabilities to enhance the overall look of your images.
How can I ensure that my product photography studio remains organized and clutter-free?
To keep your product photography studio organized and clutter-free, implement a system for storing and categorizing equipment, props, and backdrops. Regularly clean and declutter your workspace, and create a schedule for equipment maintenance and inventory checks.
Last Updated: January 22, 2024
Disclosure: We may receive affiliate compensation for some of the links in this article at no additional cost to you if you decide to purchase a product. You can read our affiliate disclosure in our privacy policy.
Kevin Fairbanks is your expert navigator in the world of Etsy business. With a passion for creativity and a deep understanding of the e-commerce landscape, Kevin brings a wealth of knowledge to aspiring and established Etsy sellers alike.
As a seasoned entrepreneur and successful owner of multiple Etsy shops, Kevin knows firsthand the challenges and triumphs of the Etsy marketplace. His journey is one of innovation, perseverance, and a keen eye for market trends, making him an invaluable guide for anyone looking to succeed on Etsy.
Kevin’s expertise extends beyond just shop management; he is adept in areas such as SEO optimization, effective marketing strategies, and financial planning for online businesses. His insights are grounded in real-world experience, offering practical and actionable advice.
Join Kevin as he shares his journey and expertise on Etsy Growth Hub. Whether you’re starting your first Etsy shop or looking to expand your existing business, Kevin’s guidance is designed to help you navigate the complexities of Etsy selling with confidence and creativity.
Stay tuned with Kevin’s latest strategies and tips on Etsy Growth Hub to transform your passion into a thriving online business. His dedication to empowering Etsy sellers is evident in every piece of advice he shares, helping you turn your Etsy dreams into reality.
Verified and Approved by:

Kevin Fairbanks
Head of SEO
Like This Article?
Share with your friends
Table of Contents
Latest Articles
Keep Reading
-
Harnessing The Power Of Influencer Marketing For Your Etsy Shop
Boost your Etsy shop’s success with influencer marketing! Learn the secrets to harnessing the power of influencers and drive more sales today. Click now for game-changing strategies!
-
Connecting And Engaging With The Etsy Community
Learn the best strategies for connecting with the Etsy community and watch your sales soar! Discover expert tips to engage with fellow artisans and boost your business. Click now to unlock the secrets of success on Etsy!
-
Efficient Shop Management For Customer Engagement
Unlock the key to customer engagement and boost your shop’s success with efficient management strategies. Learn how to increase sales and loyalty with expert tips! Click now for the secret to success in shop management.


